반응형
커스텀뷰를 이용한 토스트 그리고 스낵바를 띄우는 예제를 만들어보겠습니다.
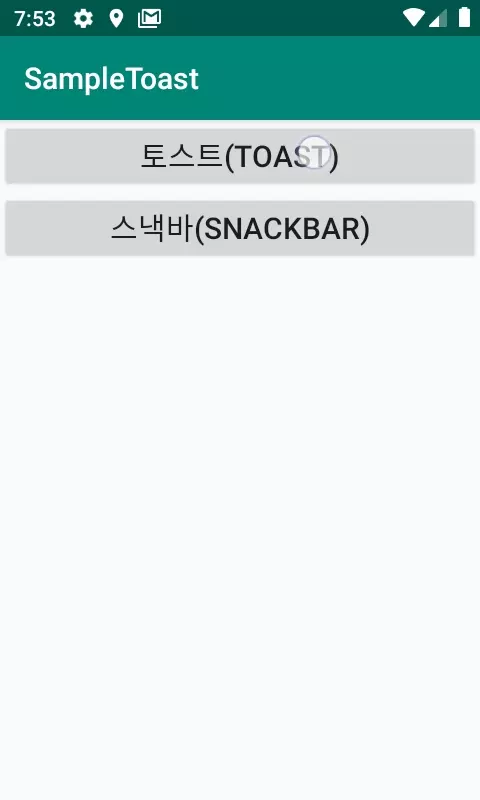
1. activity_main.xml
<?xml version="1.0" encoding="utf-8"?>
<LinearLayout
    xmlns:android="http://schemas.android.com/apk/res/android"
    xmlns:tools="http://schemas.android.com/tools"
    android:layout_width="match_parent"
    android:layout_height="match_parent"
    android:orientation="vertical"
    tools:context=".MainActivity">


    <Button
        android:id="@+id/button1"
        android:text="토스트(Toast)"
        android:textSize="20sp"
        android:layout_gravity="center"
        android:layout_width="match_parent"
        android:layout_height="wrap_content"/>

    <Button
        android:id="@+id/button2"
        android:text="스낵바(Snackbar)"
        android:textSize="20sp"
        android:layout_gravity="center"
        android:layout_width="match_parent"
        android:layout_height="wrap_content"/>

</LinearLayout>
2. toast.xml (토스트의 background 꾸미기, drawable 폴더에 생성)
<?xml version="1.0" encoding="utf-8"?>
<shape xmlns:android="http://schemas.android.com/apk/res/android"
    android:shape="rectangle">

    <stroke
        android:width="2dp"
        android:color="#050505"/>
    <solid
        android:color="#FFFFFF"/>
    <padding
        android:left="20dp"
        android:top="20dp"
        android:right="20dp"
        android:bottom="20dp"/>

    <corners
        android:radius="15dp"/>

</shape>
stroke - 테두리 색상 설정
solid - 내부 색상 설정
corners - 모서리를 둥글게 하는 정도 숫자가 클수록 더 둥글게 변합니다.
3. toast_layout.xml (토스트의 뷰를 꾸미는 레이아웃, layout 폴더에 생성)
<?xml version="1.0" encoding="utf-8"?>
<LinearLayout
    android:id="@+id/toast_layout"
    android:orientation="horizontal"
    android:padding="10dp"
    xmlns:android="http://schemas.android.com/apk/res/android" android:layout_width="match_parent"
    android:layout_height="match_parent">

    <TextView
        android:id="@+id/text"
        android:padding="20dp"
        android:textSize="10sp"
        android:background="@drawable/toast"
        android:layout_width="match_parent"
        android:layout_height="wrap_content" />

</LinearLayout>
2번에서 만든 toast.xml을 TextView의 background에 설정해줍니다.
4. MainActivity.java
package com.example.sampletoast;

import android.graphics.Color;
import android.support.design.widget.Snackbar;
import android.support.v7.app.AppCompatActivity;
import android.os.Bundle;
import android.view.Gravity;
import android.view.LayoutInflater;
import android.view.View;
import android.view.ViewGroup;
import android.widget.Button;
import android.widget.TextView;
import android.widget.Toast;

public class MainActivity extends AppCompatActivity {

    Button button1, button2;

    @Override
    protected void onCreate(Bundle savedInstanceState) {
        super.onCreate(savedInstanceState);
        setContentView(R.layout.activity_main);

        button1 = findViewById(R.id.button1);
        button1.setOnClickListener(new View.OnClickListener() {
            @Override
            public void onClick(View v) {
                onButton1Clicked(v);
            }
        });
        button2 = findViewById(R.id.button2);
        button2.setOnClickListener(new View.OnClickListener() {
            @Override
            public void onClick(View v) {
                onButton2Clicked(v);
            }
        });
    }


    //커스텀 토스트 띄우기
    public void onButton1Clicked(View view) {
        LayoutInflater inflater = getLayoutInflater();

        View layout = inflater.inflate(
                R.layout.toast_layout,
                (ViewGroup) findViewById(R.id.toast_layout));

        TextView text = layout.findViewById(R.id.text);

        Toast toast = new Toast(this);

        text.setText("토스트 띄우기");

        text.setTextSize(15);

        text.setTextColor(Color.BLACK);

        toast.setGravity(Gravity.BOTTOM,0,0);

        toast.setDuration(Toast.LENGTH_SHORT);

        toast.setView(layout);

        toast.show();
    }

    //스낵바 띄우기
    public void onButton2Clicked(View view) {

        final Snackbar snackbar = Snackbar.make(view,"스낵바",Snackbar.LENGTH_LONG);

        //스낵바 우측 텍스트 띄우고 터치 했을때 이벤트 설정
        snackbar.setAction("스낵바 없애기", new View.OnClickListener() {
            @Override
            public void onClick(View v) {
                snackbar.dismiss();
            }
        });

        snackbar.show();
    }
}
LayoutInflater를 이용해서 3번에서 생성한 뷰를 가져와서 토스트에 설정해주는 방식입니다.
기본으로 제공되는 토스트를 사용하시려면
Toast.makeText(this, "", Toast.LENGTH_SHORT).show();
위 코드처럼 사용해주시면 됩니다.
setGravity(gravity, x좌표, y좌표)
gravity - Gravity.Bottom, Gravity.Top의 형태로 사용해주시면 됩니다.
setGravity를 이용하시면 토스트의 위치를 변경해서 보여줄 수 있습니다.
Snackbar의 액션을 설정해주는 부분을 스낵바가 사라지도록 설정을 했는데 원하는 대로 수정해서 사용하시면 좋을 것 같습니다.
위 코드는 'Do It 안드로이드 프로그래밍' 을 참고하여 만들었습니다.
반응형
'안드로이드 > 코드' 카테고리의 다른 글
| [온라인마케팅] 애드센스 크롤러 액세스 등록 (0) | 2020.01.07 |
|---|---|
| [안드로이드] 웹뷰 사용하기 - WebView (2) | 2020.01.06 |
| [안드로이드] 앱 내부에서 언어 설정 변경하기 (feat.Spinner) (1) | 2020.01.04 |
| [안드로이드] 위험 권한 요청후 갤러리 사진 가져오기 (0) | 2020.01.03 |
| [안드로이드] Volley, Json을 이용해서 로또 당첨번호 조회하기 (0) | 2020.01.02 |


